Saturday, June 5, 2021

Stand, Tower Fan Disassembly for Cleaning

How do you disassemble a stand/tower fan for cleaning?

Almost a year ago, we bought a stand/tower fan. It was nice and fits in a corner perfectly, or even next to a bookshelf, or wherever you want to. It does not have a swivel head that can knock off something here and there, a safety hazard.

The problem is, the stand/tower fan assembly is quite different, integrated enough to keep any dust cleaning futile. And any instruction manual would say not to disassemble the unit unless you are a qualified technician.

I kept myself from that, contented with simply dusting off whatever can be reached, but then the wind is not so strong anymore. So I broke loose and disassembled my stand/tower fan. You should be able to do it as well.

Here I present the process in pictures, from fully disassembled back to the assembled unit. Your unit may be different, but it will be similar.


This shows the circular fan blade unit, blade guard, covers, and base.


Blade guard put in place, not screwed on.


Blade guard assembled back to the inner cover. This is also the swivel unit, and this is where a lot of dust is collected and can't be cleaned without disassembly.


This now shows the cover that holds the motors, and where the circular fan blade is attached. The circular fan blade collected so much dust that it had to be washed with water and a bit of detergent to make sure it is free of dust and oil, as much as possible. No strong cleaning agent is used.


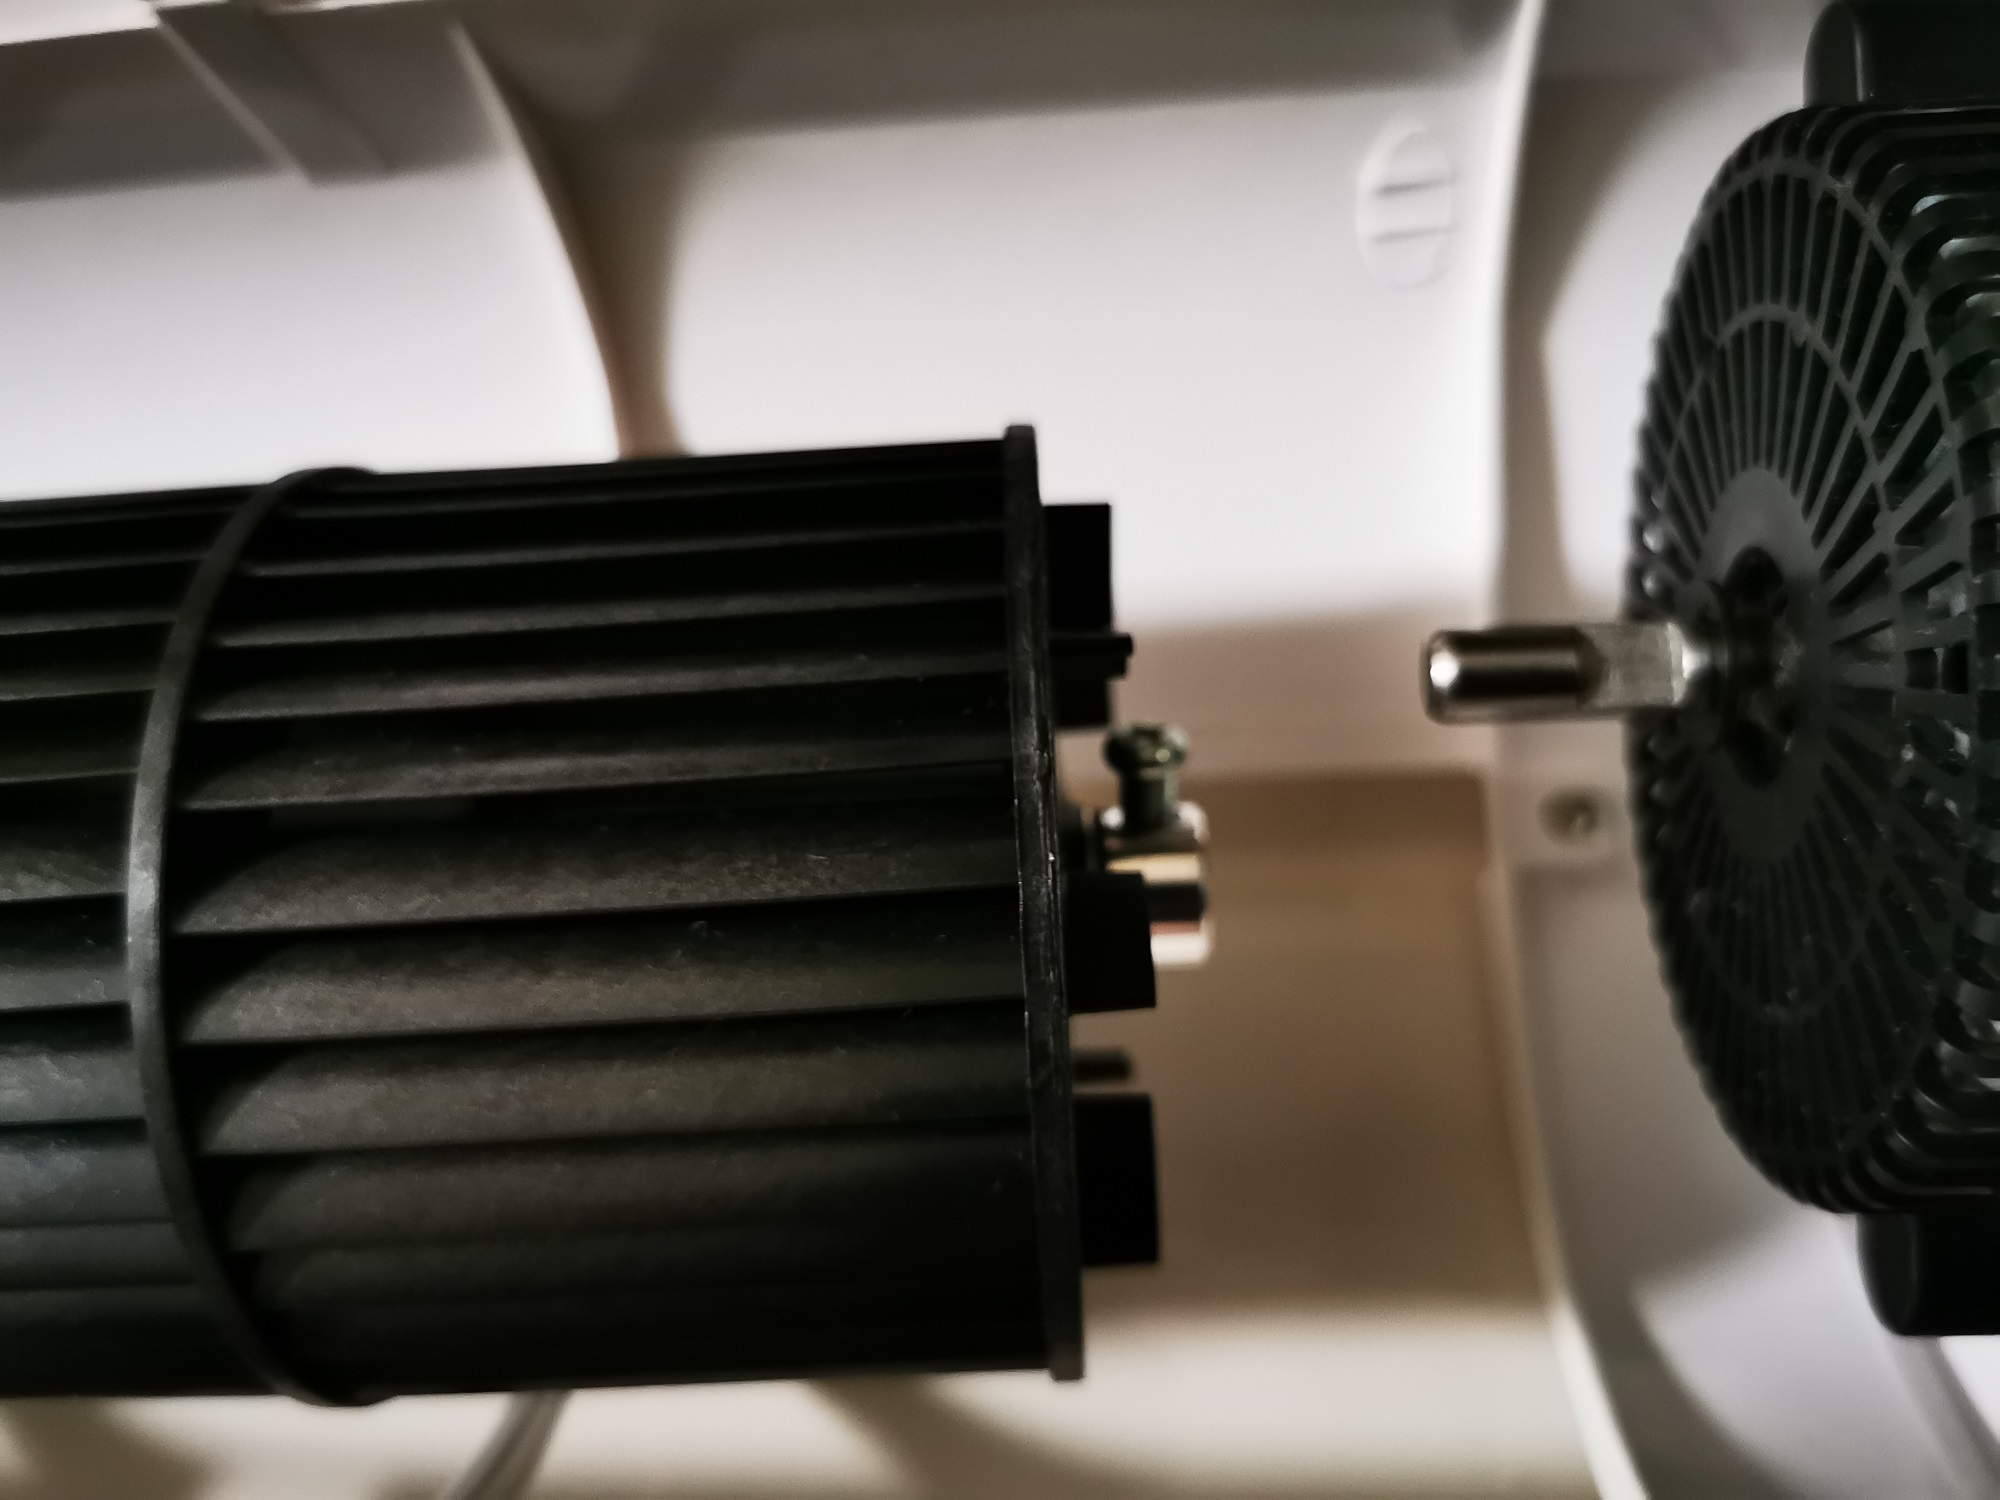
The bottom part of the fan blade unit and motor axle on the right showing a flat notch - that is where the screw must be pointing once put back.


Just another brighter picture.


Fan blade unit with the guide on top attached, unscrewed yet.


Fan blade assembled back. The inner fan blade cover is shown, and it also has a guide on top (left side). Actually, this cover unit is also the swivel unit if this were a normal stand fan. This is why it has a guide on top, as it also attaches to a motor at the bottom.


Close up of the swivel unit attached to the guide on top, with screw partially in.


Swivel unit attached to the motor at the bottom, screws on.


Fan blade with fan guard and swivel unit all assembled back in. This is the cover at the back, for assembly.


Back cover assembled back, screwed on.


This is the last cover, the back cover, to be put back.


Last piece, the base. 3 screws to hold it fast to the stand/tower fan unit.


Bottom of the base, showing the screws.


The stand/tower fan unit is finally assembled back and is ready to use!


Here is a short video showing the fan operational after the disassembly and cleaning.


Now, follow the steps from the bottom up to do the stand/tower fan disassembly for cleaning. I hope this helps you as it finally helped me. I am not a qualified technician but I am a tinker who needs to clean his stand/tower fan to make it operate like new again. A strong, clean wind even at 01 speed only.

Till then!

Thursday, January 27, 2011

How to keep paintbrush ready for next painting job

A painter painting a room in a houseImage via WikipediaA couple of months ago, our house got renovated. The living room flooring was done. The whole kitchen was done. And the repainting of the whole house was done.

There were some other jobs that were done, and they were done when the main contractor has completed, so a touch-up was necessary. One of these is the painting of newly-installed gas pipings, so they don't look like left undone or obviously newer items.

The old man came, and did the job. We chatted, and he left with us all the remaining can of paints, and one brush - after I told him that there are some other things I am doing that will need a paint retouch. Since he is leaving me a used brush, he told me how to keep it useable and available anytime.

How is that actually?

Very simple. 

Put it in a container filled with water, making sure that the bristles are submerged in the water. A container that is small enough to be kept and hidden from meddling hands, but big enough to hold water for some time. I think a covered container will do. So that will be better off as a container that is still OK, but anytime can be discarded.

Do that, and you won't have to worry about washing your used brushes anymore. Forget about paint washing solutions, or washing away paint with detergent, or kerosene, or whatever you would do to wash paint off from your paint brush and get them clean and ready for the next painting job.

Or course, that means you have to be using your paintbrushes sooner or later, but not too long afterwards. And don't submerge the handles, OK?

Enhanced by Zemanta

Friday, May 15, 2009

Posted at wrong blog, but…

I made a wrong post to my DIY blog; I was unaware that the selected blog was a different one than what I had in mind. Anyway, I have again updated my health at home and away blog.

Visit my other blog, and get updates on the swine flu outbreak.


Reblog this post [with Zemanta]

Friday, April 10, 2009

Post using Small Email Sender, with picture!

Well, this is a very simple desktop blog editor, and it works with attachments (pictures, I've tested so far).

And the only set-up is like sending e-mail. Actually, Small Email Sender is primarily for sending e-mail without Outlook/Express, but I figure that since it is possible to post to your blogs using e-mail, then it should work the same way.

If you see this post in my blog, it works!

Test Post using MS Word 2007

I'm trying to do a post using MS Word 2007 with attachment. If this works, this will be it.


Here goes!


Ooopppsss! Pictures are not easily attached and posted; have to set-up properly, which, at the moment, I don't know how! Any help will be much appreciated!

Test Post from Semagic

OK. This is a test post from Semagic blog post editor, so anyway I am sending it to my DIY at home blog.

Hope it works, hope it goes through. I'm already becoming desperate looking for a blog post editor that REALLY works. So I really hope Semagic works!

Thursday, April 2, 2009

First post

Well, I just wanted to share what I know about home DIYs, based on my experience from doing them myself, but I haven't got time to organize my thoughts yet. I have a number of books to finish, and while doing that, when the thought comes, then I will drop them all here, so it doesn't wait until I'm done with my book reading.

I don't think the books will go away. I've committed to reading books as part of my personal development, but that doesn't mean I will not have time to write posts, especially that I know they will help others, one way or another.

So with this first post, I hope I have the started to roll the ball.

Help me keep it rolling. If you have anything in mind about home DIY, drop me a comment. If I don't know it myself, I will find people who does. Usually a book or magazine or some other articles are second references - they may spell out the process, but not the experience.

That is where all the world of difference lies.

Till then.